Today's crimping irons have a different purpose. Back in the '80s when big hair reined, this appliance left highway-sized indentations in the hair, which would create lots of frizz and off the scale volume. It was an all-around epic tool but then suddenly it wasn't so cool anymore. No longer did women want huge crimped grooves in their hair. They were looking for a different form of texture, so a new use was imagined.
Enter Sam Villa and his TEXTUR Iron, an amazing tool with a new purpose: adding volume and staying power to styles. Here are a couple of ways to amp up fine and limp hair and to help styles keep their shape.
First, let's talk about the concept of the iron.
When hair texture is changed, it becomes more pliable and easy to work with. Perfect for thin, limp tresses, the TEXTUR Iron is designed with smaller grooves to create fine texture in the hair, which results in more volume. After the hair has been textured, simply brush it out with a styling brush and watch the volume appear. The texture that the iron creates will remain in the hair until your next shampoo.
Now that weve explained the concept, let's take a look at the different ways you can use the iron.
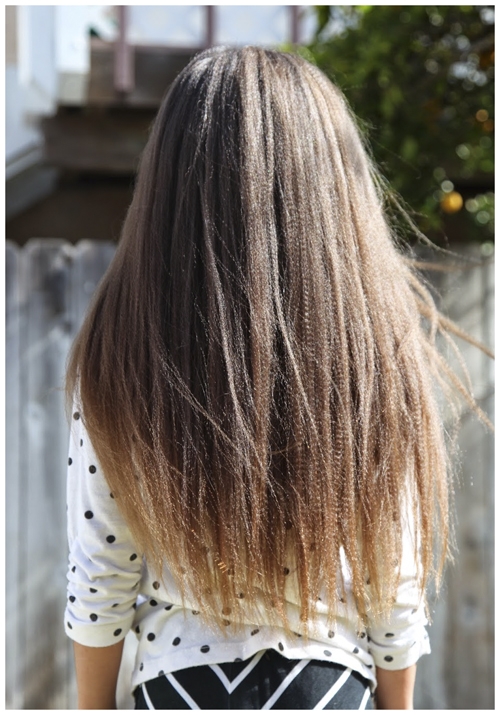
Scrimping
Sam introduced the genius concept shortly after releasing the TEXTUR iron. The idea behind this technique is simple: change the surface texture of the hair to get curls to hold.
How to Scrimp Your Hair
- Go through your hair and compress (clamp down on sections) using the texturizing iron from the scalp to the ends.
- You don't need to texturize all of the hair, just compress, skip an inch or two, then compress again until you reach the ends.
- As you compress, you'll notice the hair thickens and the surface texture goes from smooth to a rougher feel. This is the texture you want in your hair to add volume.
- Next, curl your hair as you normally would. Because of the added texture and grip, your curls will last all day long.

Root Lift
We've all invested in a large amount of root lifting sprays and we are all guilty of backcombing (teasing) for days just to add more volume at the crown. The problem with root lifting sprays is that they can leave a crunchy finish that sometimes only lasts for a few short hours. Backcombing is rough on your hair and can cause breakage, not to mention a mess of tangles. Here's a simple styling technique to help create lift with selective volume.
How To Get More Lift at The Scalp
- Spray your hair first with a heat protectant spray. This will protect your hair from any heat damage and will also help to set the texture in more. Sam recommends Redken iron shape 11.
- Take a section in the crown area that is no wider than the plates of iron, lift up and comb through, then compress using the TEXTUR Iron next to the scalp.
- Repeat this process throughout the entire crown area.
- Finally, smooth out the texture with your styling brush and voila, you have texture throughout the crown.
- Hot Tip: If your hair starts to fall flat simply massage your scalp with your fingers tips to awaken the texture and your volume will return.

See the full technique here:
 Create Volume for Days
Big hair is in and the Sam Villa TEXTUR Iron is the key. After texturizing the entire head, remember to brush through the texture with a styling brush and then add polish and shine with Redken's Diamond Oil.
Make Your Texture Set Last For Up To 5 Days
- Day 1: Leave your hair down
- Day 2: Try the scrimping technique (above) and add some curls
- Day 3: Test out a romantic side braid
- Day 4 & 5: Throw your hair into a messy top bun.
For more tutorials and styling techniques, visit Sam Villa's blog.
Sam Villa is the Co-Founder of Sam Villa and Global Artistic Ambassador for Redken 5th Avenue.
All photos, videos, and techniques are courtesy of Sam Villa.